|
|
|
|
|
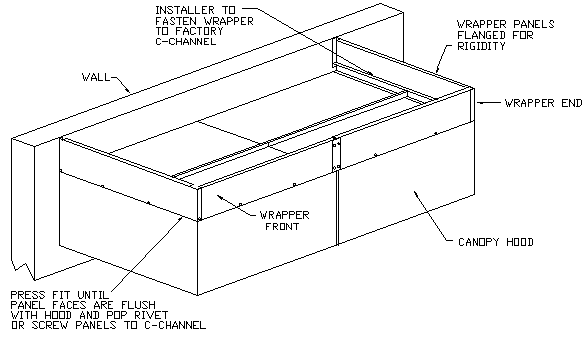
- Unwrap the wrapper panels from the shipping container.
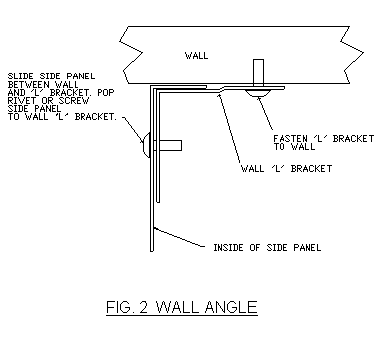
- Locate "L" brackets if supplied. Position and fasten brackets
parallel to corner of hood on the wall. Brackets should be offset at least
1/16" in from edge of hood in order for wrapper face to mount flush
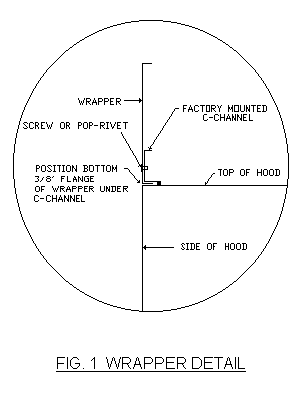
with the hood (Fig. 1,2)
- Locate one of the side wrapper panels and position it on the hood so
that the 3/8" flange on the bottom of panel slips underneath the
C-channel on top of the hood. (Fig. 1)
|
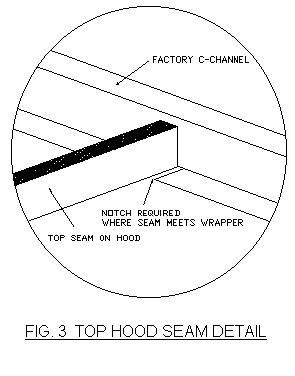
Note: A notch will have to be cut on the wrapper flange using shears (tin
snips) where interference occurs. (Fig. 3)
|
- Press fit panel into place until wrapper face is flush with hood face. Screw or pop-rivet
wrapper to the C-channel and "L" bracket. (Fig. 1)
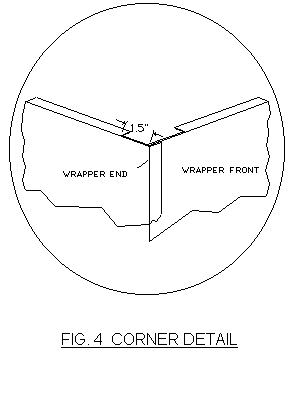
- Locate front wrapper panel. Position its' lower 3/8" flange under
C-channel of hood and slide panel into position so that the end of front
panel is behind the 90 degree bend of side panel. (Fig. 4) Once into place,
press fit the lower flange of the front panel into C-channel in order to
have wrapper face flush with front of hood. Screw or pop-rivet bottom of
front panel to the C-channel.
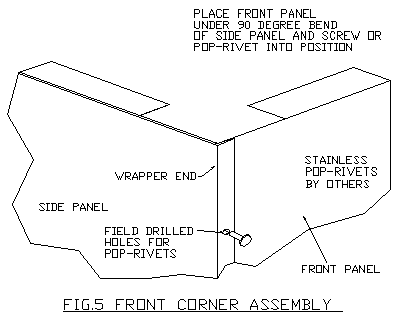
- Drill appropriate holes and rivet front to end panel. (Fig. 5)
- If multiple panels are used
(i.e. hood is side to side or back to back to another), a stainless trim
will be provided to attach multiple panels together. Attach the panels by
slipping them behind the stainless trim and fastening with screws or rivets.
(Fig. 5)
|
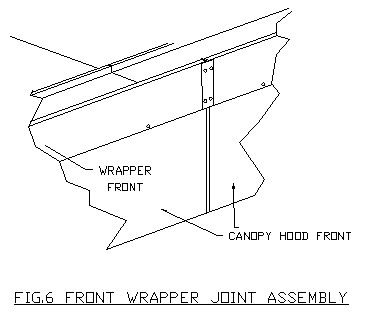
Note: Trim length will have to be cut to fit. In
most instances, trim should extend from bottom of hood to top of wrapper
panel. (Fig. 6)
|
|
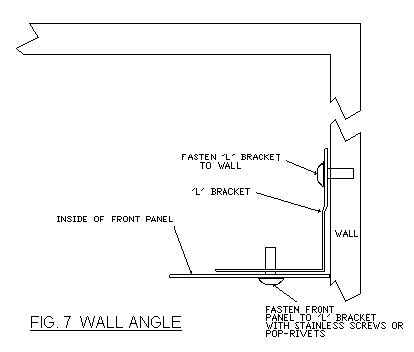
- Locate the other side panel. Repeat steps 2,3,4. Pop rivet as previously
done in step 5. Note: In most instances where hood is located against a side
wall, fasten the front wrapper panel to the "L" bracket. A second
side panel will not be shipped. Pop rivet or screw front wrapper panel to
bracket. (Fig. 7)
- Caulk all gaps and seams.
|
|
|
COMPLETED WRAPPER ASSEMBLY
|
|
|
|
|
|
|
|
|
|
|
FOR SINGLE HOODS EXCEEDING 16 FEET
|
|
FOR HOODS WITH SIDE WALL AND STANDOFF OPTION:
|
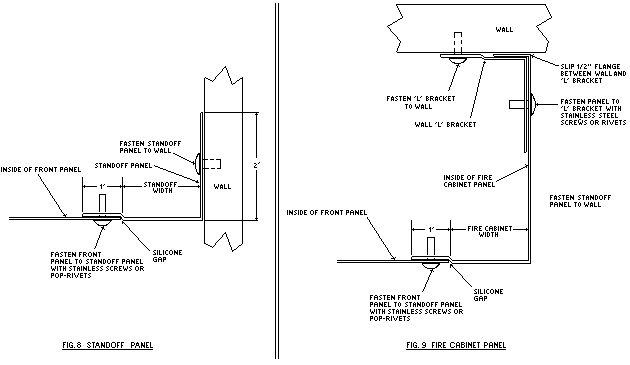
- Complete steps 1 through 4 of the standard instructions.
- Locate standoff panel. Slip its' lower 3/8" flange under factory
C-channel. Front face of panel should be even with front of hood.
Fasten panel to wall and C-channel.
- Locate front panel of wrapper assembly. Slip its' lower 3/8"
flange under factory C-channel. Slide panel end behind the 90 degree
bend of side panel. (Fig. 4) Once in position, make sure wrapper
face and hood face are flush. Screw or rivet front panel to
C-channel and standoff panel (Fig. 8)
- Locate a corner gusset and install under top corner of the wrapper
where 90 degree bend meets the front panel. (Fig. 5)
- Caulk all gaps and seams.
|
|
FOR 16 FOOT HOODS WITH ATTACHED FIRE CABINET:
|
- Complete steps 1 through 7 of standard instructions.
- Locate fire cabinet wrapper panel. Repeat steps 2,3,4 for this panel.
Make sure that 1 inch offset flange of fire cabinet slides behind
front panel. A corner gusset will not be necessary for this
application. Pop rivet or screw fire cabinet panel to front
panel, C-channel, and "L" bracket. (Fig. 9)
- Caulk all gaps and seams.
|
|
